NOTE: I’ve updated this letter after applying the recommendations in it. Scroll down to read more.
⬇️
I’ve been thinking about the word workflow recently.
We use workflow to mean “process” but the second part of the word ought to be doing more heavy-lifting.
What does it mean when the work flows and how do we get to that place? I have some ideas and examples! But first I’m going to talk about process.
Because boy, I’m deep in it now…
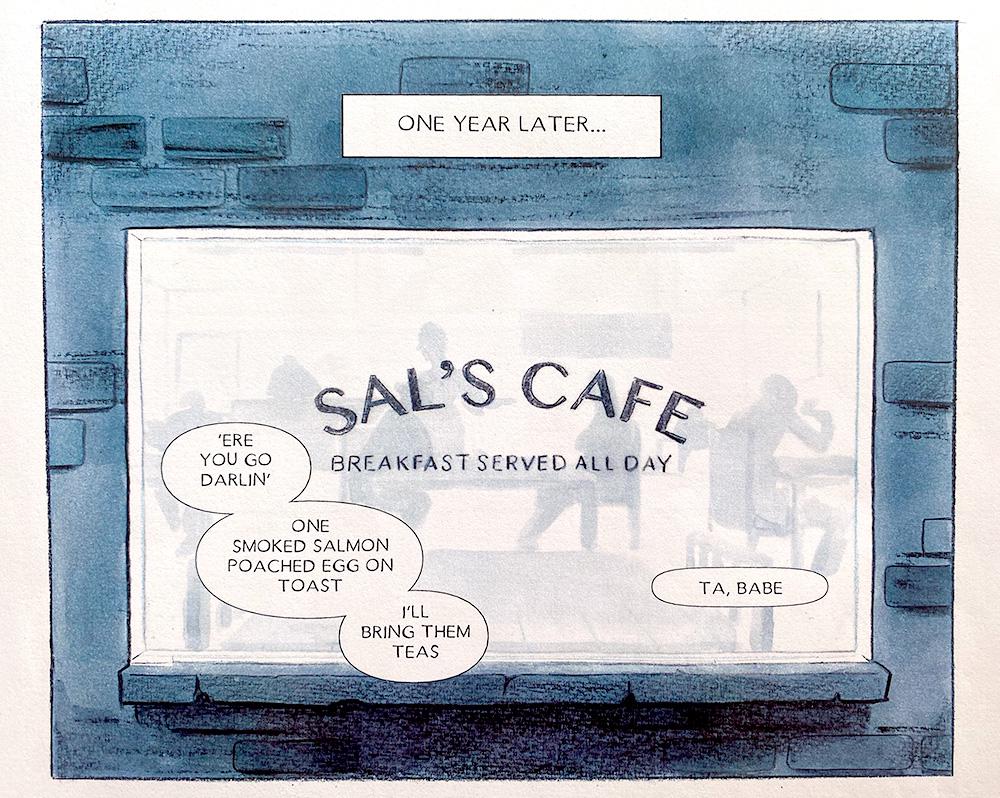
A completed panel from my graphic novel! It's printed out on cheap office paper to check for readability.
My graphic novel writing process
If you recently joined, I am in the early stages of writing and drawing my debut graphic novel.
The script is (largely) written, the characters (largely) formed. I’ve spent the last six weeks trialing a process, drawing the first chapter from start to finish.
The process for getting a single page from pencil to printer is shaping up like this:
- Thumbnails: figure out the panels and how to lay them out on the page. I wrote about this in detail two years ago - it’s a useful letter!
- Dummy layouts: roughly pencil each page in A4, work out composition and placing of balloons and the flow between pages.
- Pencils: draw the page in A3 size with graphite pencils.
- “Inking”: transfer the drawings to A3 watercolour paper and clean up the line work with a wax pencil.
- Colouring: use a mix of acrylic ink, watercolour pencil and wax pencils.
- Scanning & adjusting: get the artwork into Photoshop, size it down to A4 and tweak the colours.
- Adding text: create speech balloons and text in Adobe Illustrator.
- Final layout: send to Adobe Indesign and lay out the page.
I mean…phewf!
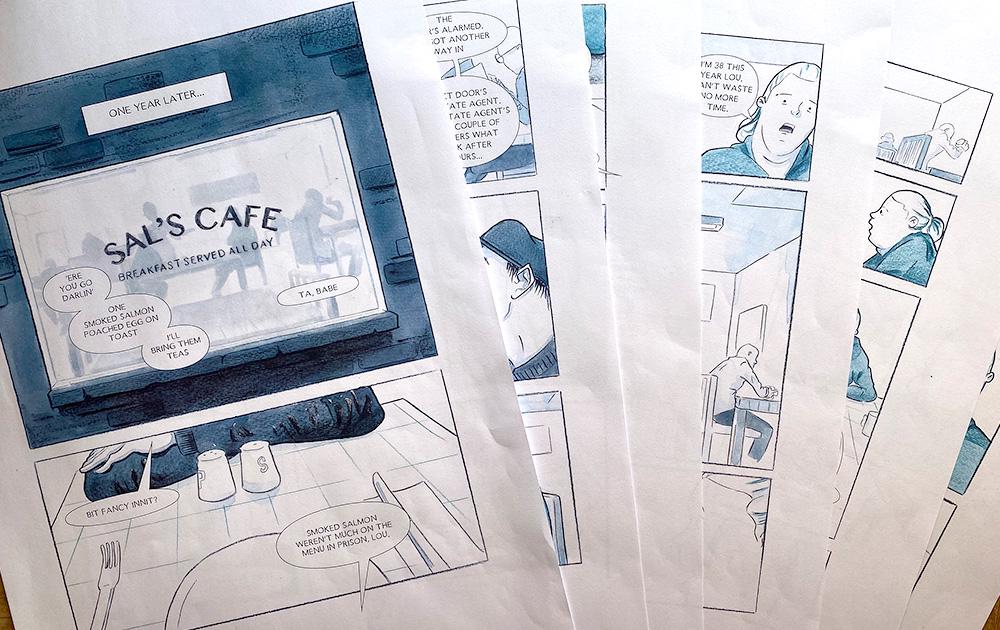
Here's the outcome of all that work: six pages in six weeks
Created one-by-one, and with a full-time job, each page takes a week to complete. At this rate, it’ll take me four years to finish the book — and that’s just too damn long!
And this, you see, is why I’m thinking a lot about workflow.
Flow & Ooze
Workflow is that happy place where the work happens almost effortlessly. There are no obstacles to the work, only the work itself. The creative process is designed to minimise distraction; the creative space is designed so that when the artist reaches for a pencil, it’s right where it’s supposed to be.
This is not the same as creative flow — the state of focus and immersion made famous by Mihaly Csikszentmihalyi. That’s a mental state. What I’m talking about here happens in the physical world.
The opposite of workflow is workooze. This is where the work happens, but in a stop-start fashion, clumsily and erratically. There is no system in place, so the artist is constantly changing mental modes; the desk is a mess and they can never find that pencil. As a result, the work drips out stubbornly.
I spent much of the last six weeks in a state of work-ooze. While painting my first chapter, my desk was littered with pages, some drying, others waiting to be painted. Brushes rolled around, pencils disappeared under paper.
At one point I was holding a sheet of paper and a loaded brush in the same hand. The paper slipped and a splodge of ink hit the artwork.
This was when I realised I need to make some changes.
So! Here are three ways I’m trying to turn my work-ooze into work-flow.
1: Reduce my tools
Work flows more when you use fewer materials.
We find the image of the chaotic artist’s studio romantic, but perhaps that’s deceptive.
For example, take a look at the studio of the Paris-based oil painter Vladislav Yashin. As Léa Wai writes in her encounter with him, his studio contains only three things: the canvas he’s working on, a cart carrying a small number of tools, and a light.
Yashin’s palette is composed of just five pigments. He knows how to make any colour from this simple base.
Yes, artistic mastery is the ability to create incredible work in your medium; but I wonder if mastery is also about optimisation — reducing your tools to their bare minimum.
Watch this video and you’ll see inside the pencil case of one of my favourite artists, Eliza Ivanova. Again, it contains just three items: a single mechanical pencil, a blending stump and an eraser. And with only these items, she makes these spellbinding drawings.
Fewer tools clearly doesn’t limit your creative ability; most likely, it enhances it.
And with fewer supplies to buy, you can afford to spend more money on higher quality materials.
2: Optimise my space
Work flows when your creative space is optimised, so that everything has a place and is quickly retrieved.
Watch this video of U.S. comics legend Joe Kubert and notice how particular he is about the arrangement and proximity of his pens, brushes and paper. And while you’re there, admire the man’s pre-internet filing system for references!
Van Neistat takes it a step further, customising his studio to maximise efficiency. Every item in his studio has a place and is designed so that it can be retrieved and replaced with a single hand. He builds his own shelves and uses hooks, bulldog clips and pins to give everything its place.
(This applies to digital spaces too. Every video editor and motion designer arranges their workspaces in a certain way with windows and plugins placed just so).
After reducing the number of pencils, brushes and other paraphernalia, I’m rearranging my creative space so that everything has a carefully thought-out place. When I reach for that pencil, it’s at hand’s reach — every time.
3: Intentional context-switching
Work really flows when you stay consistently in a single mode.
The loose and free-flowing mode of thumbnailing a page is very different to the careful and controlled mode of inking that page; or the analytical mode of plotting the story beats of a scene.
Switching modes kills flow. So there’s gains to be made in designing a system that minimises mode-switching and makes it intentional. In tech and business this is called batch processing.
Instead of drawing a page at a time, I’m going to work on my book 30 pages at a time: laying them out together, pencilling them together and so on. The longer I stay in a particular mode, the faster I’ll be.
This will have other benefits too: my drawings should be more consistent across many pages, and so too will my painting.
Why this matters
I’m not saying that artists should be efficient machines – art is a joyfully meandering, unpredictable and unknowable journey. The process naturally involves waste and inefficiency.
But if you’re going to meander, it ought to be when the pencil is in contact with the paper, not before.
In previous letters , I have talked about the powerful way time compounds in your favour.
Well, it works in reverse too. If (like me) you spend five seconds trying to find the pencil you just put down, every time you put it down, those seconds soon become minutes and even hours of wasted time - just looking for your damn pencil!
These are just ideas. I plan to test them out this summer and report back. Meanwhile, if you have your own ways of improving workflow, reply to this email and tell me!
A couple of useful things from people I love!
Kirby Ferguson is releasing a new online course where he shares all the wisdom he’s gained about making great creative work. It’s called The Remix Method and available to pre-order at a generous discount. Check it out!
And author Jack Cheng - previously mentioned - has built an excellent little app for note-taking. You might think “who needs another note-taking app?” but this one devilish in its simplicity and built with care. The work flows. And it’s free to use!
📌
Update: June 2024
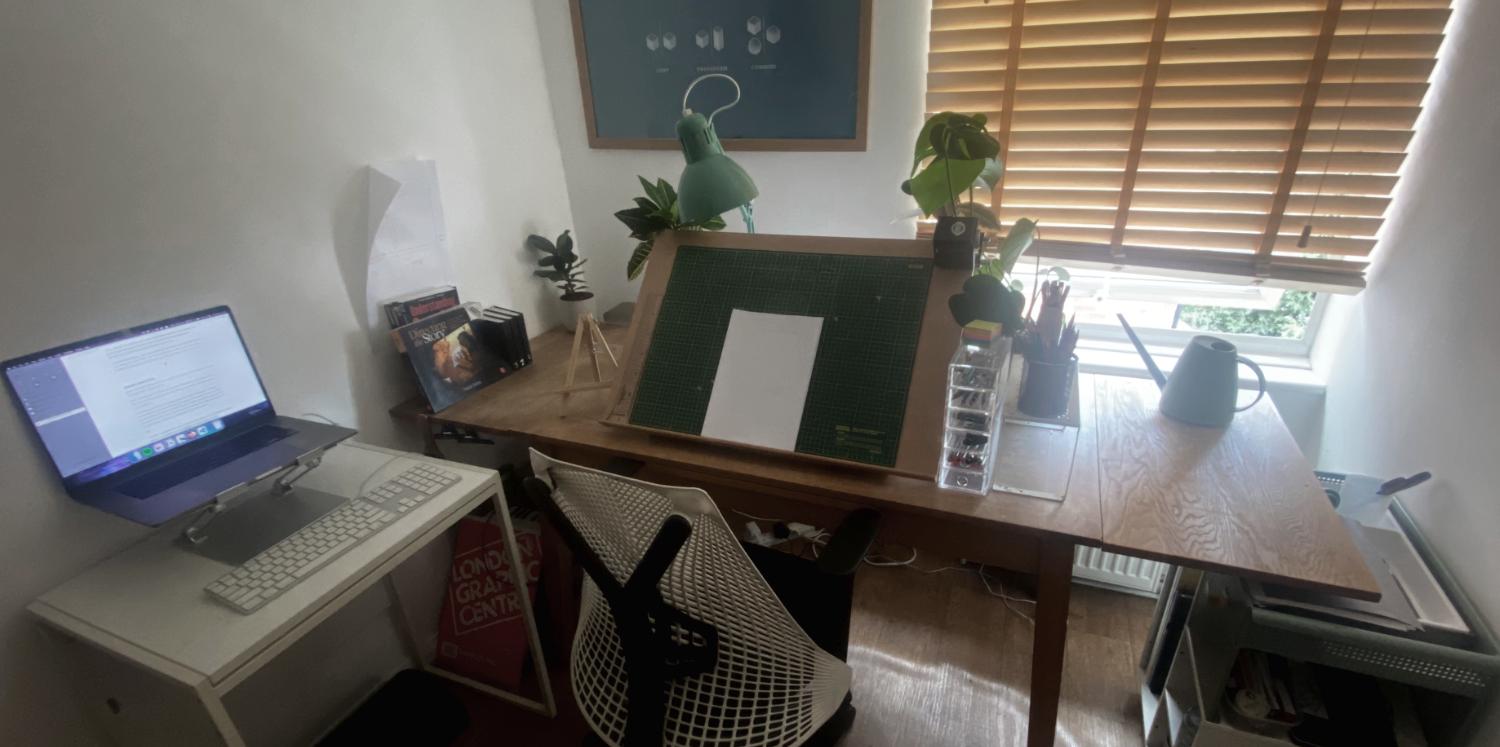
In the weeks after writing this letter, I applied my own lessons and redesigned my studio space.
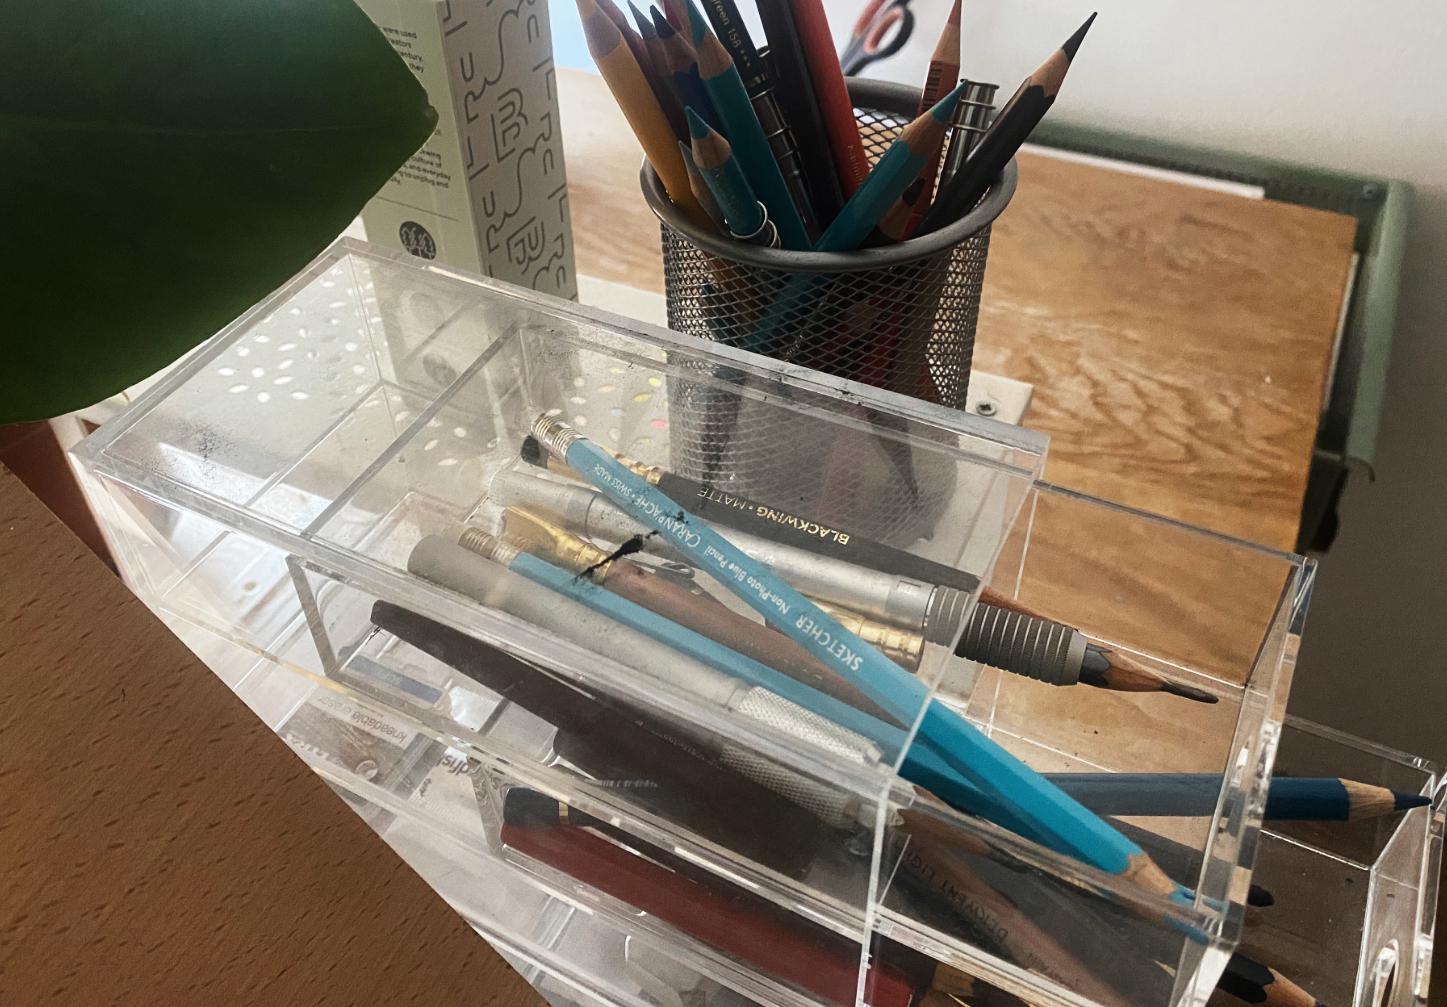
First, I reduced my tools. I cut back my rather ridiculous pencil collection to just a few graphite and coloured pencils. My desktop now contains only the supplies I use on a daily basis.
I moved my pencils over to the right hand side of my drawing table - I’m right-handed after all. This simple change has stopped me dropping or losing so many pencils as they stay in just one hand. They’re all neatly arranged by type in this see-through drawer from Muji. Graphite pencils in the top draw, blue colour pencils in the drawer below; erasers and sharpeners in the draws below.
Secondly, I optimised my space. I added a small desk, just for my laptop, freeing up space on my art table and creating a kind of digital/analogue divide.
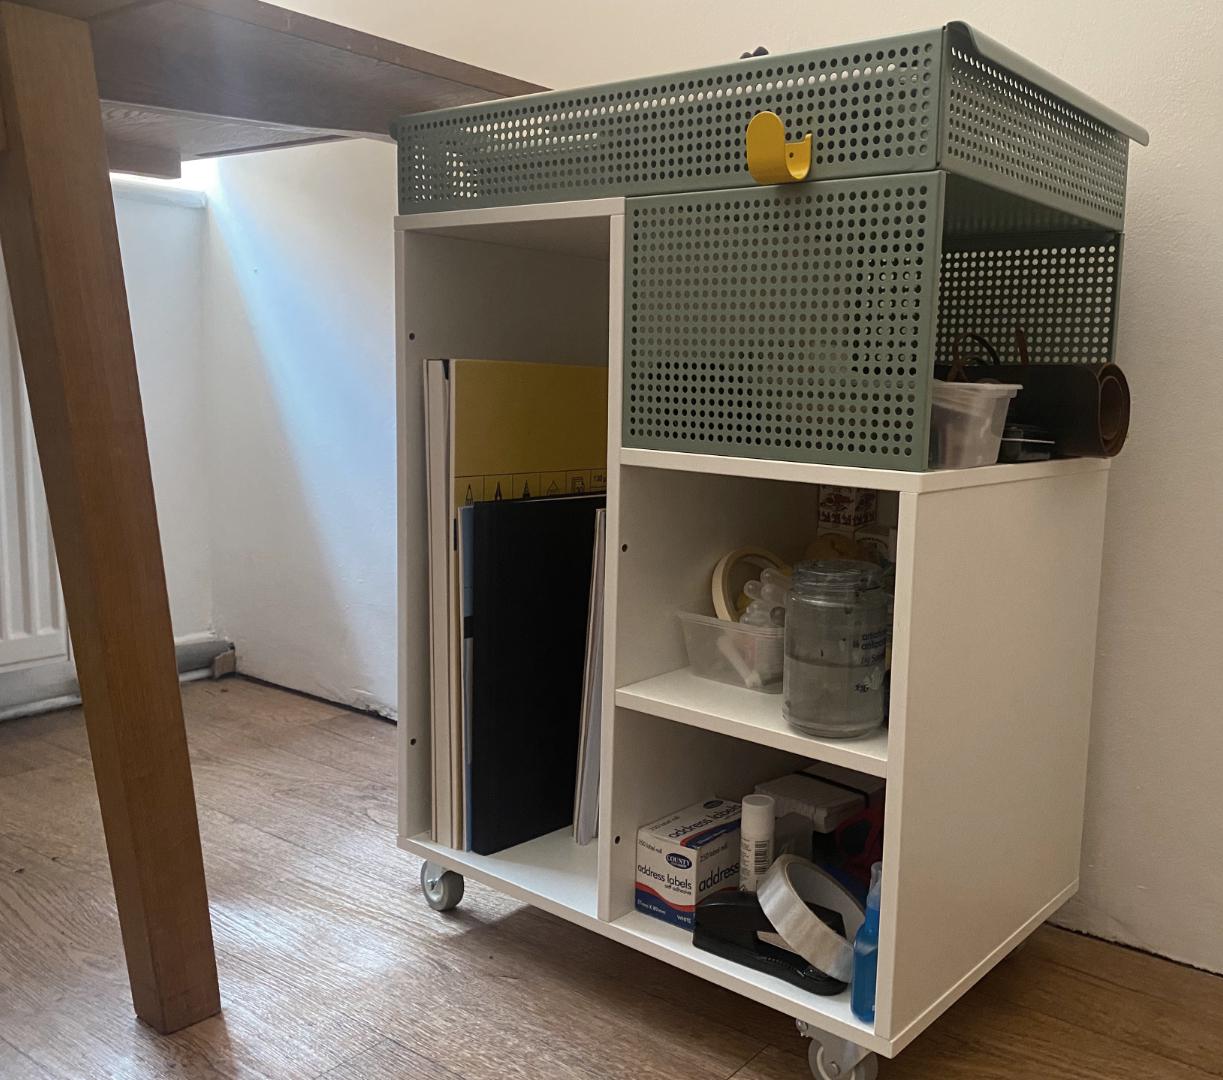
Next, I bought this rather handsome art-trolly from Ikea, which slots neatly under my table. It’s organised with a space for dry materials, another for wet; plus a shelf for all my paper stock.
Beware: building and organising this was extremely satisfying.
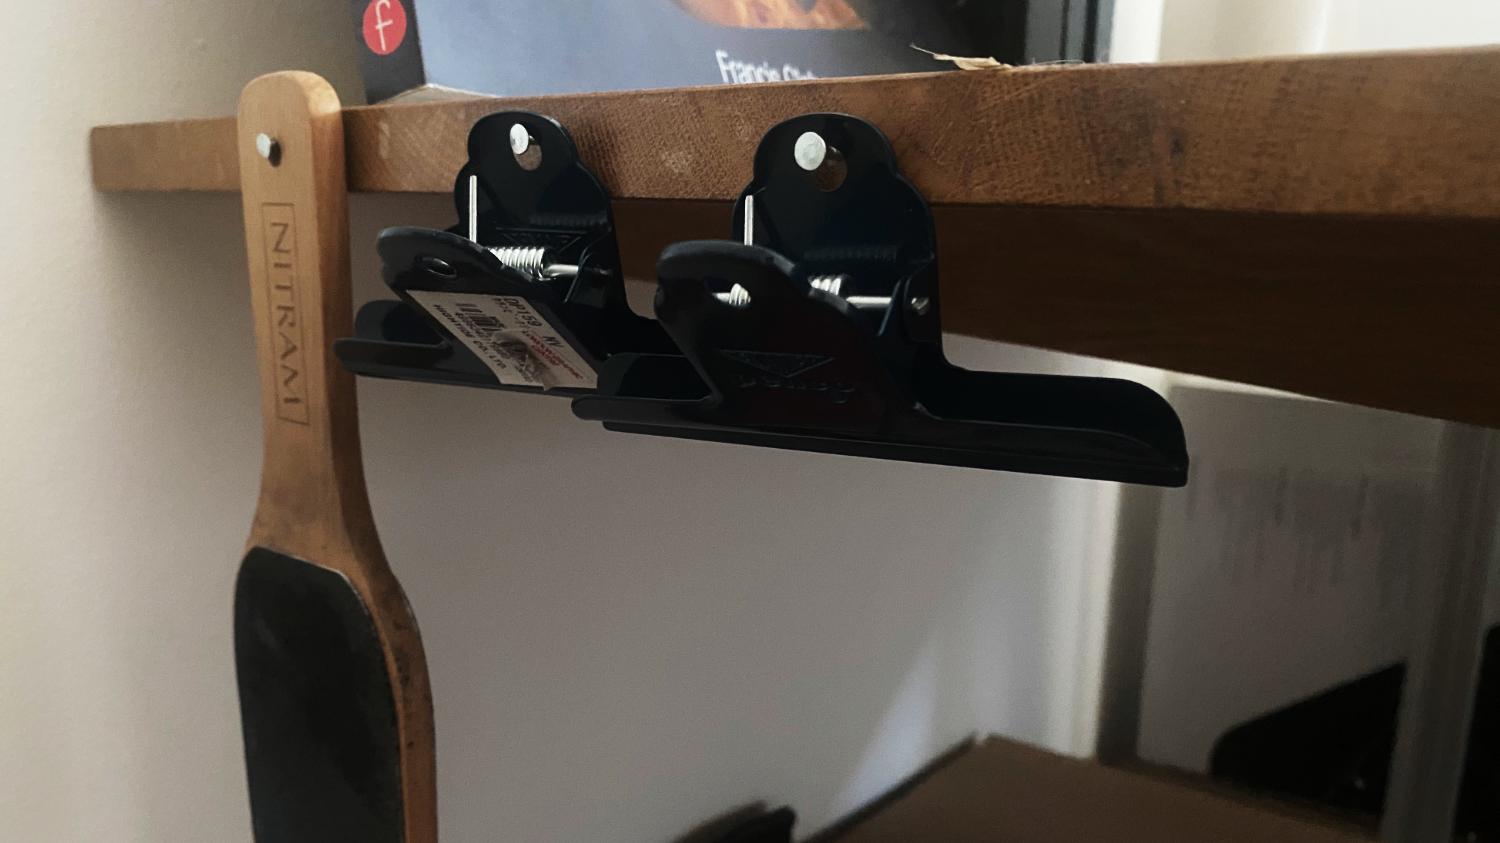
Following Van Neistat’s advice (above), I customised my desk by hammering these nails in. On them, I hang my bulldog clips and sandpaper block, three items that are difficult to store neatly and yet have holes drilled in: sometimes the object tells you how it wants to be stored!
And the final touch: a comfy footrest which helps my posture.
After working with this new system for a few weeks, I can confirm its efficacy. I’ve drawn 40 pages of comic and only dropped my pencil twice!
Until another Sunday soon,
